flutter 布局学习
RowWidget 横向布局
- 不灵活布局
1 | import 'package:flutter/material.dart'; |
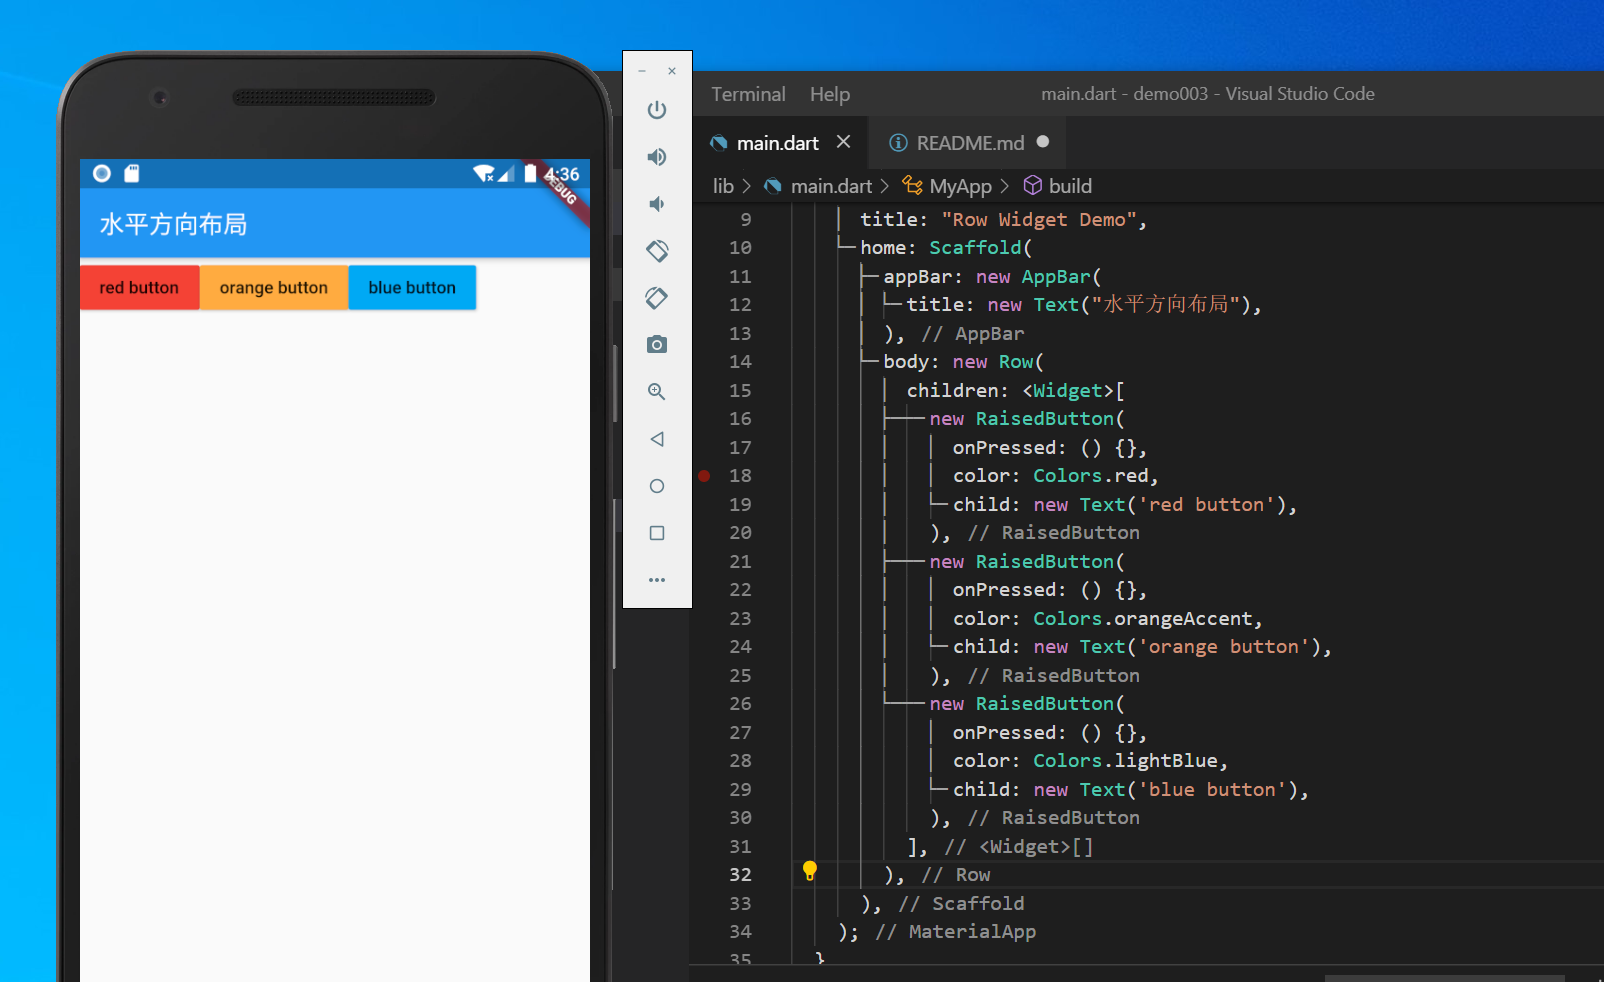
这时候你会发现的页面已经有了三个按钮,但这三个按钮并没有充满一行,而是出现了空隙。这就是不灵活横向排列造成的。它根据子元素的大小来进行排列。如果我们想实现充满一行的效果,就要使用灵活水平布局了。
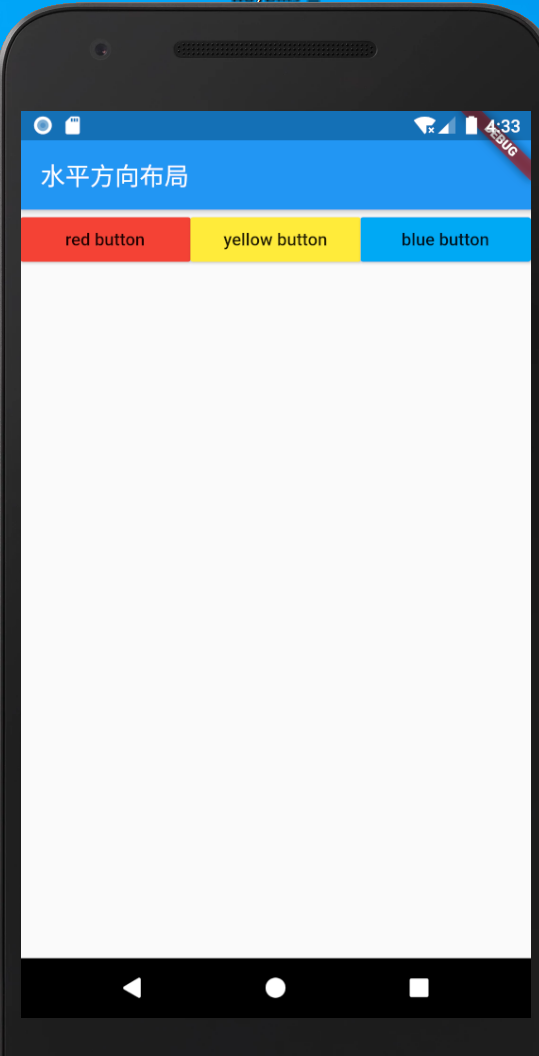
- 灵活水平布局
解决上面有空隙的问题,可以使用 Expanded来进行解决,也就是我们说的灵活布局。我们在按钮的外边加入Expanded就可以了,代码如下:
1 | import 'package:flutter/material.dart'; |
这时候就可以布满一行了,效果如下图。
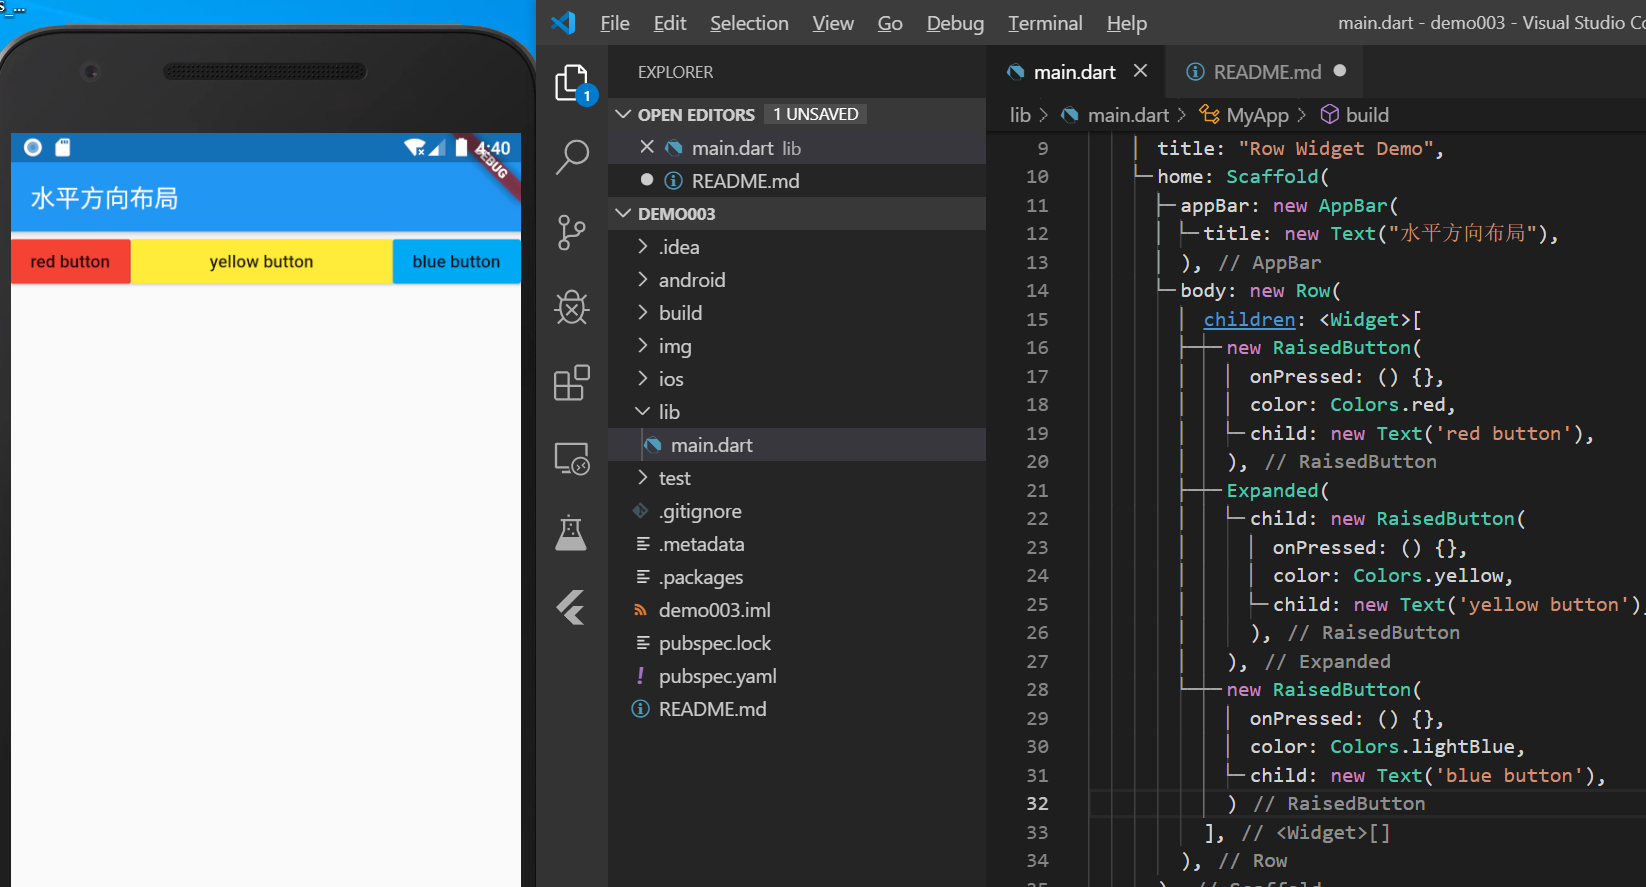
- 灵活和不灵活的混用
1 | import 'package:flutter/material.dart'; |
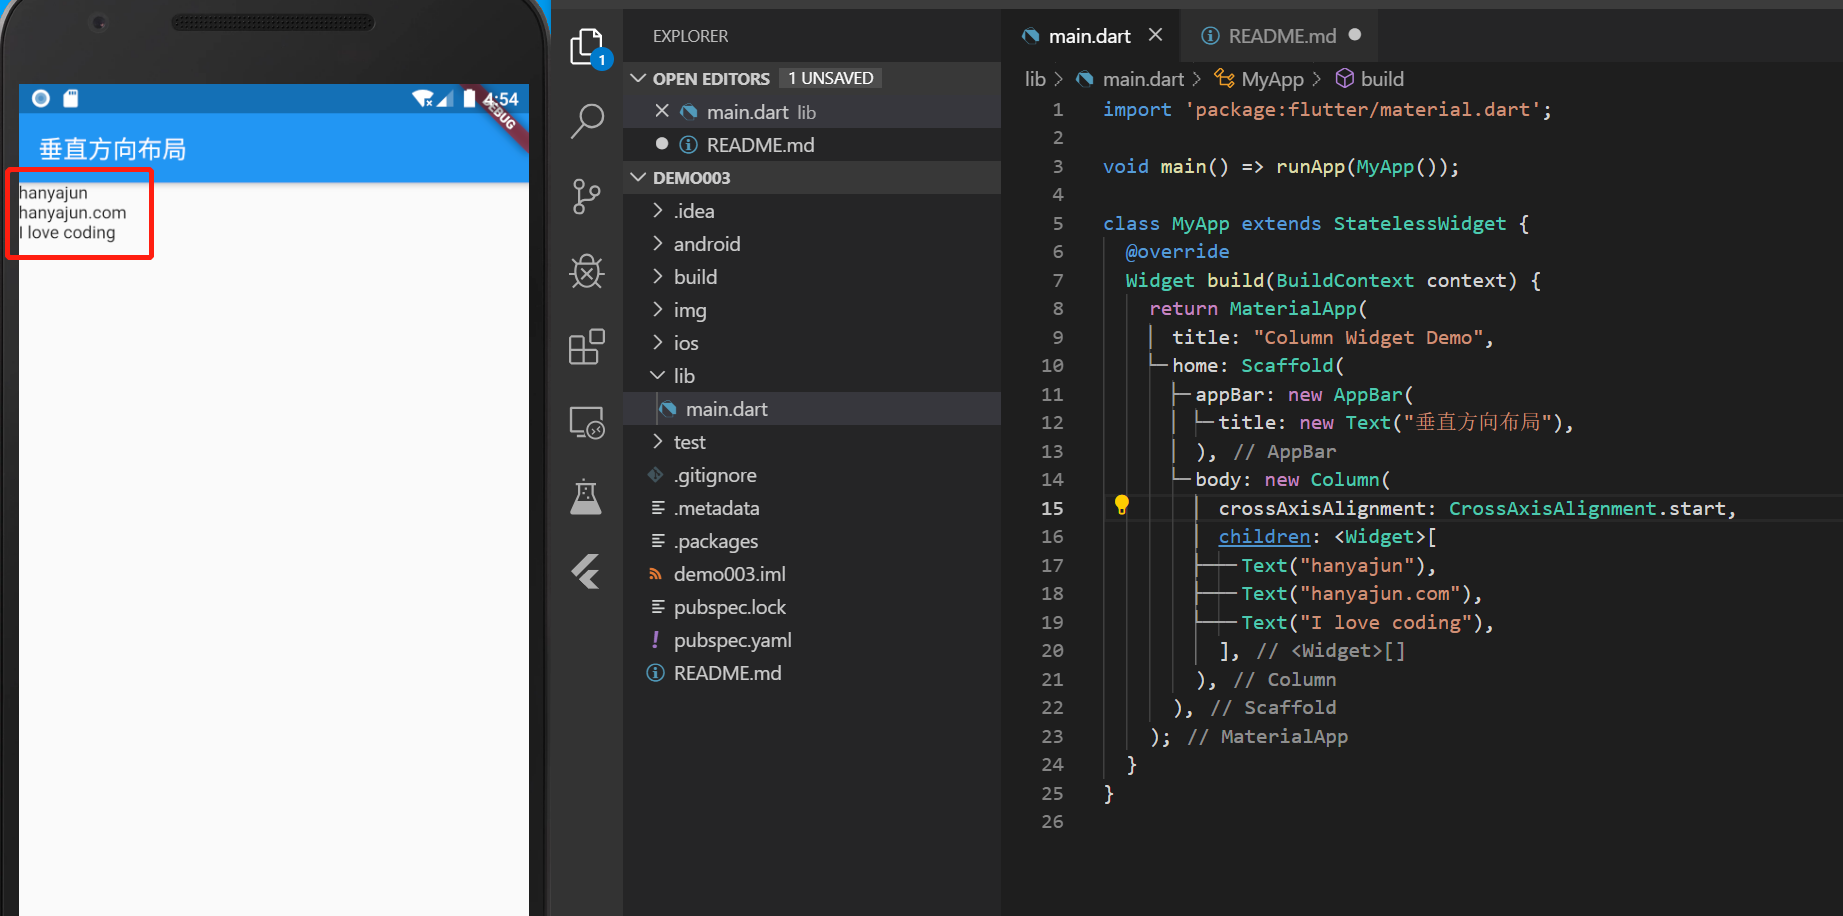
ColumnWidget 纵向布局
1 | import 'package:flutter/material.dart'; |
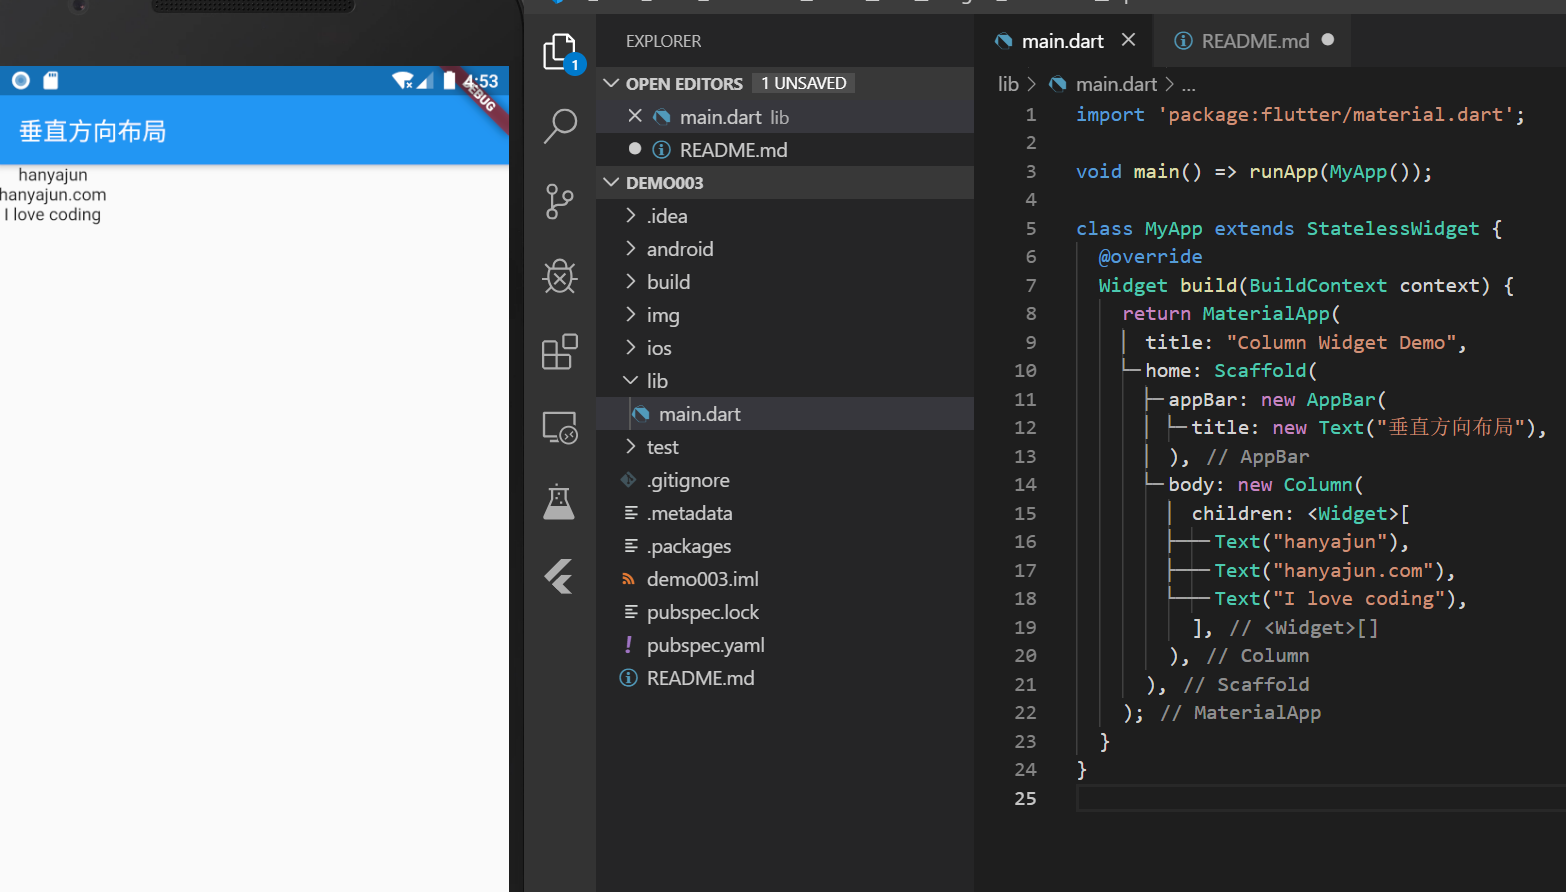
这时候你会发现文字是以最长的一段文字居中对齐的,看起来很别扭。那如果想让文字以左边开始对齐,只需要加入一个对齐属性。
- CrossAxisAlignment.star:居左对齐。
- CrossAxisAlignment.end:居右对齐。
- CrossAxisAlignment.center:居中对齐
1 | import 'package:flutter/material.dart'; |
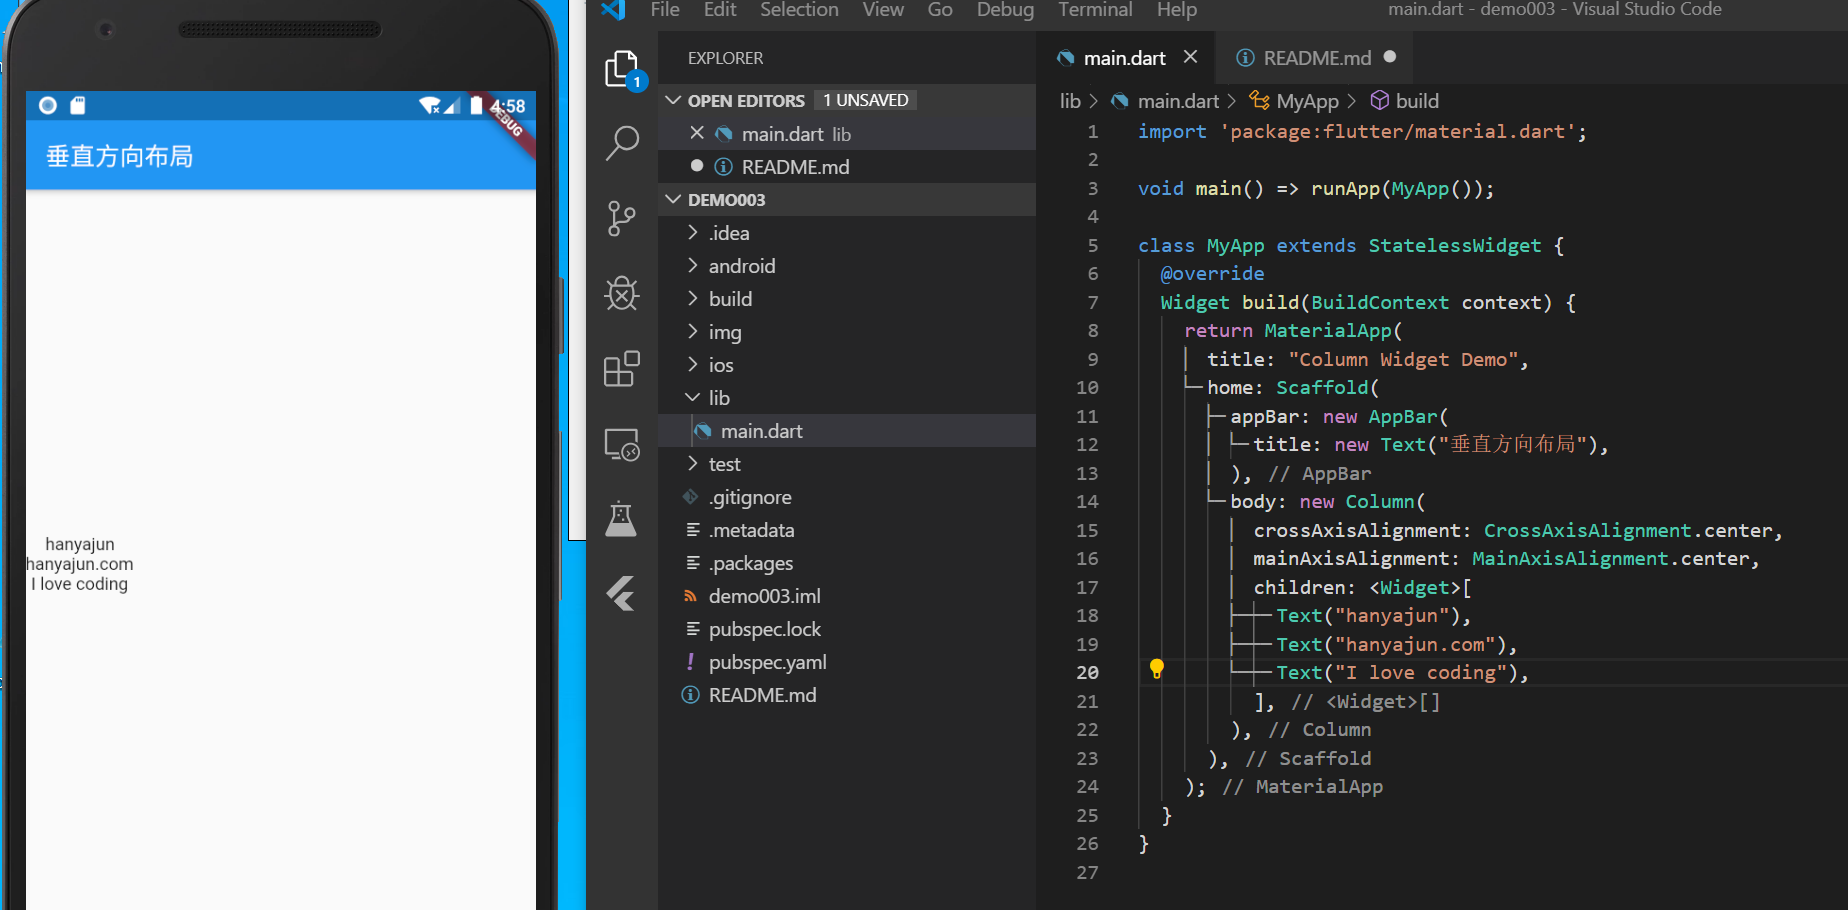
主轴和副轴的辨识
在设置对齐方式的时候你会发现右mainAxisAlignment属性,意思就是主轴对齐方式,那什么是主轴,什么又是幅轴那。
-
main轴:如果你用column组件,那垂直就是主轴,如果你用Row组件,那水平就是主轴。
-
cross轴:cross轴我们称为幅轴,是和主轴垂直的方向。比如Row组件,那垂直就是幅轴,Column组件的幅轴就是水平方向的。
主轴和幅轴我们搞清楚,才能在实际工作中随心所欲的进行布局。
比如现在我们要把上面的代码,改成垂直方向居中。因为用的是Column组件,所以就是主轴方向,这时候你要用的就是主轴对齐了。
1 | import 'package:flutter/material.dart'; |
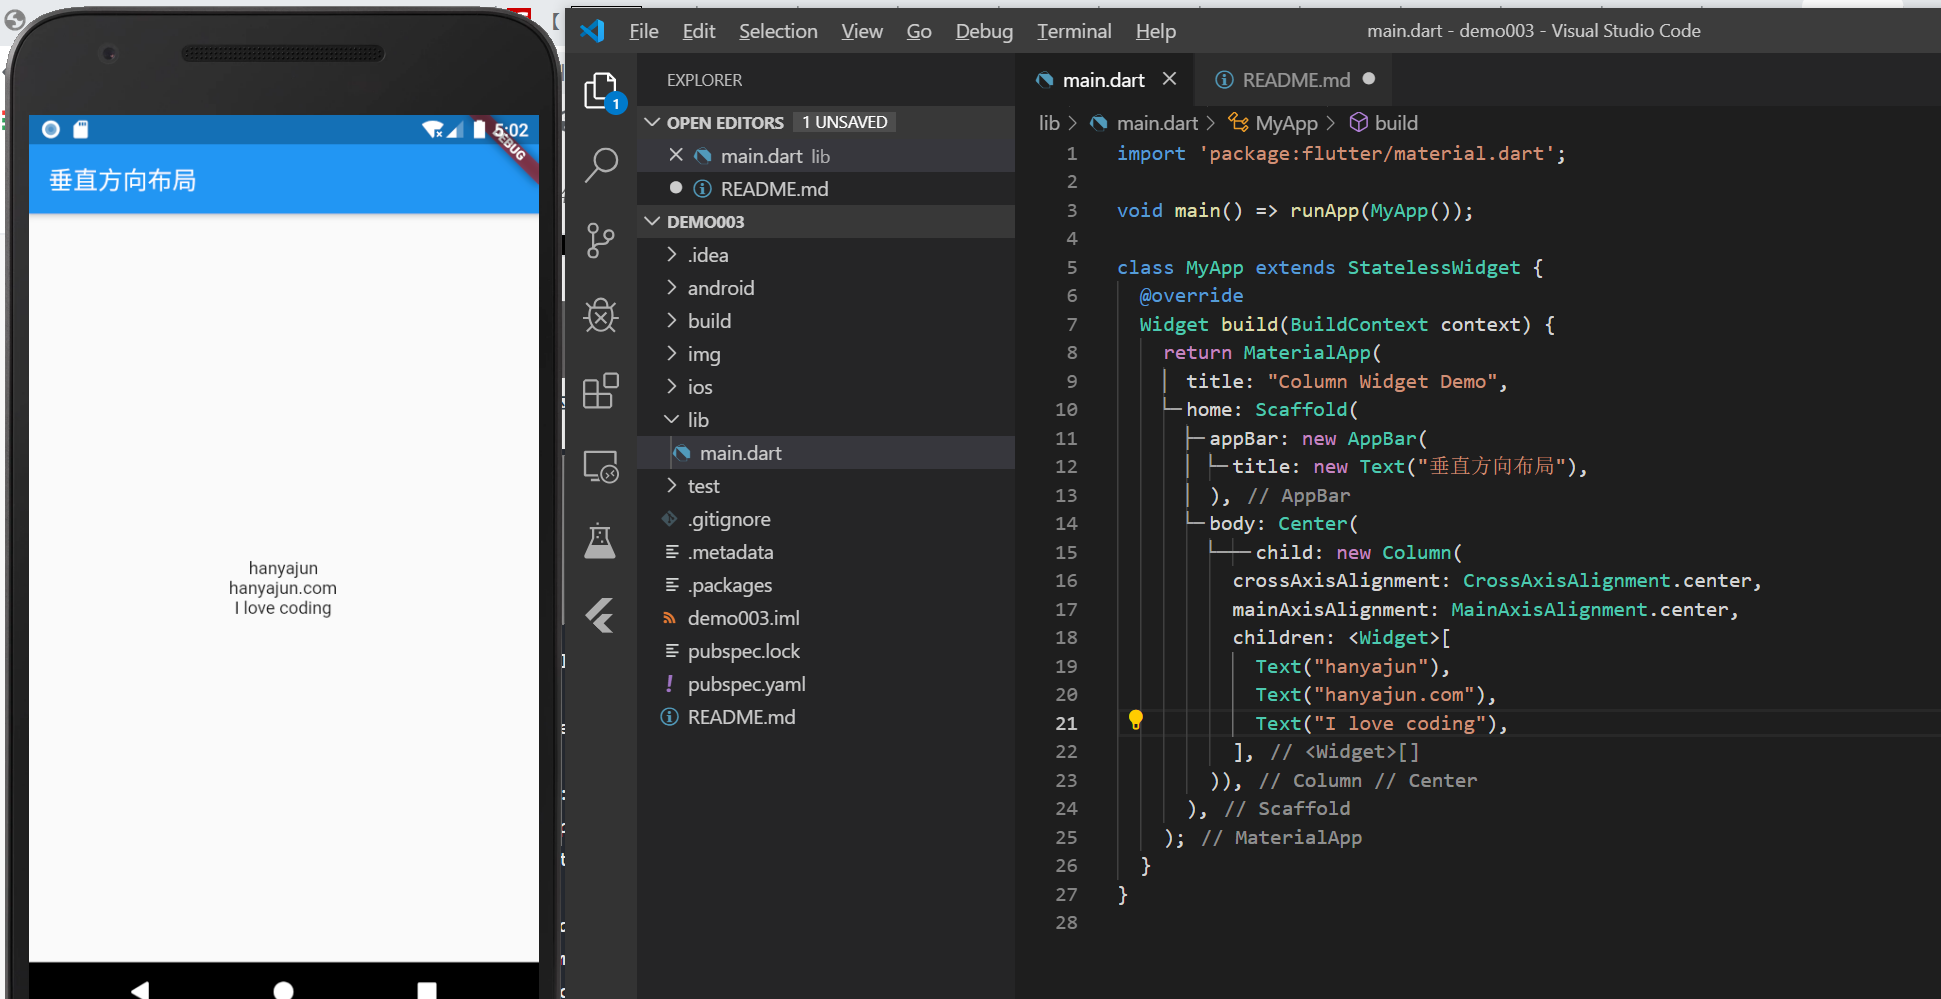
水平方向相对屏幕居中
让文字相对于水平方向居中,我们如何处理?其实只要加入Center组件就可以轻松解决。
1 | import 'package:flutter/material.dart'; |
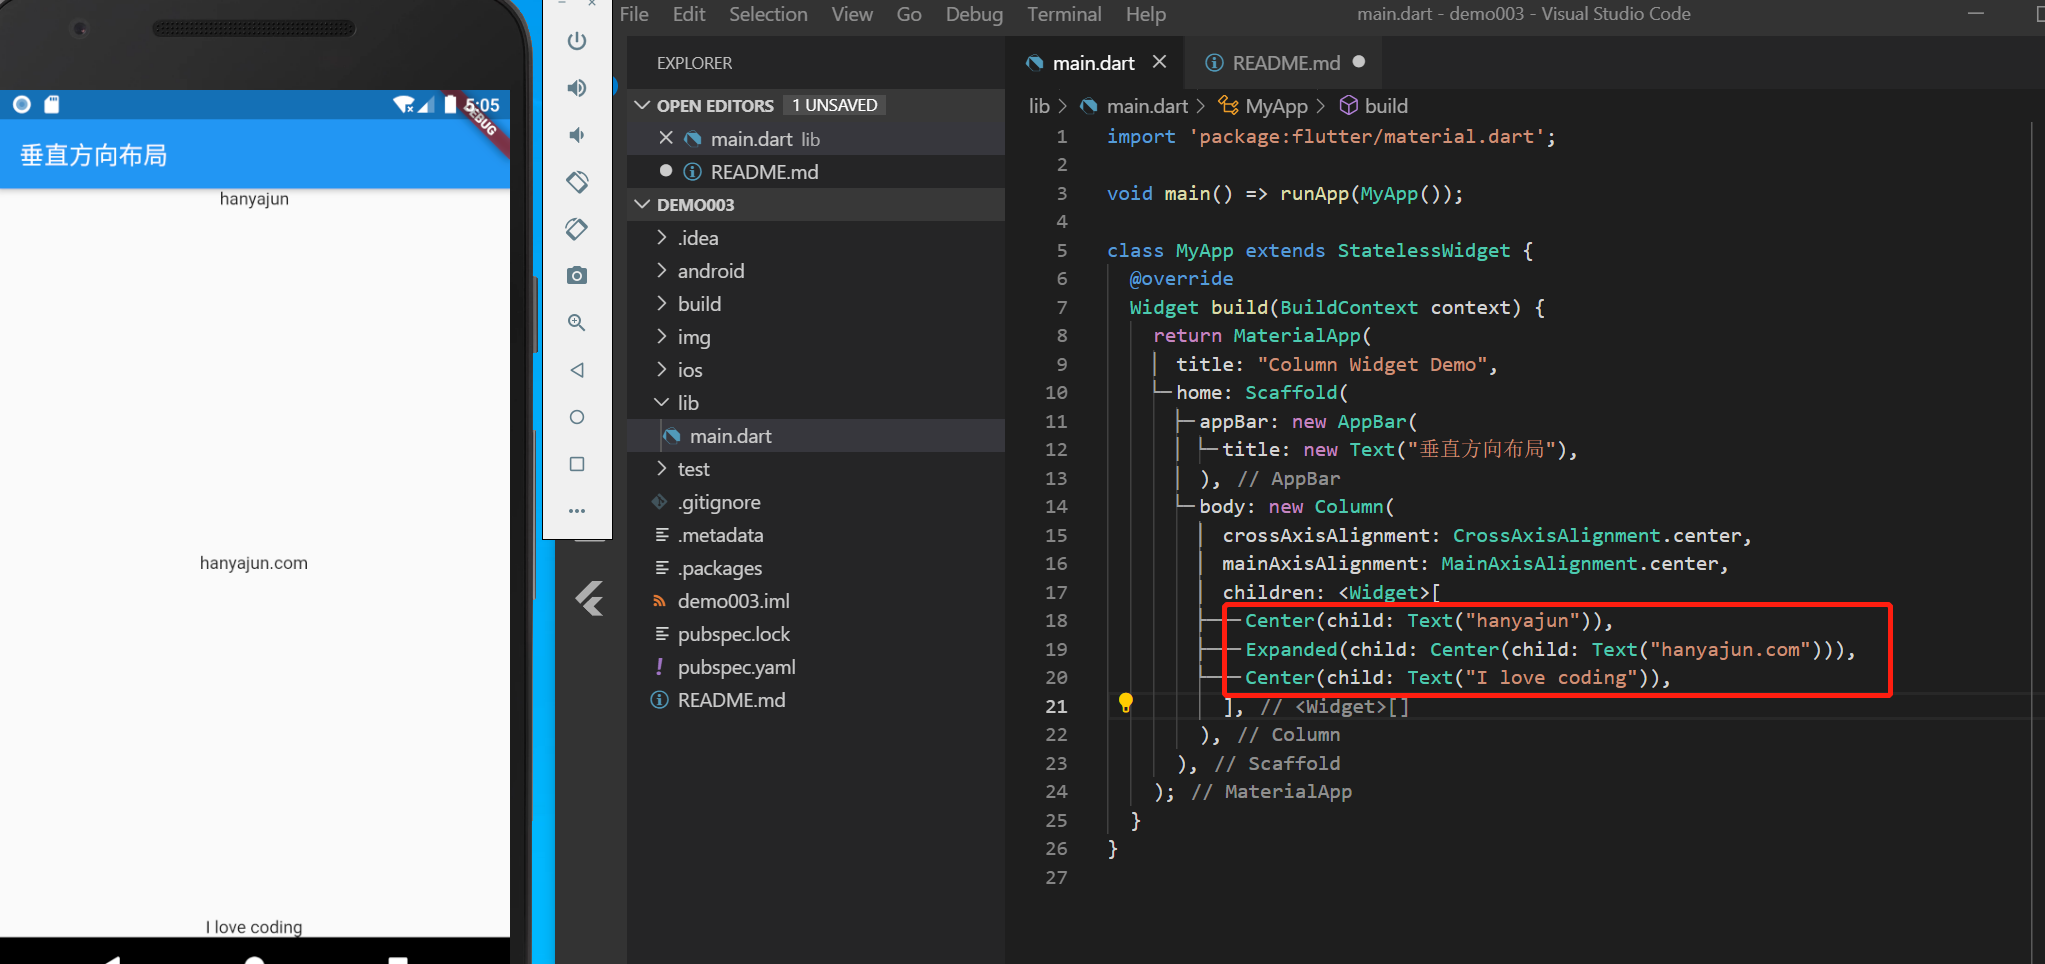
Expanded属性的使用
其实在学习水平布局的时候我们对Expanded有了深刻的理解,它就是灵活布局。比如我们想让中间区域变大,而头部区域和底部根据文字所占空间进行显示。
1 | import 'package:flutter/material.dart'; |
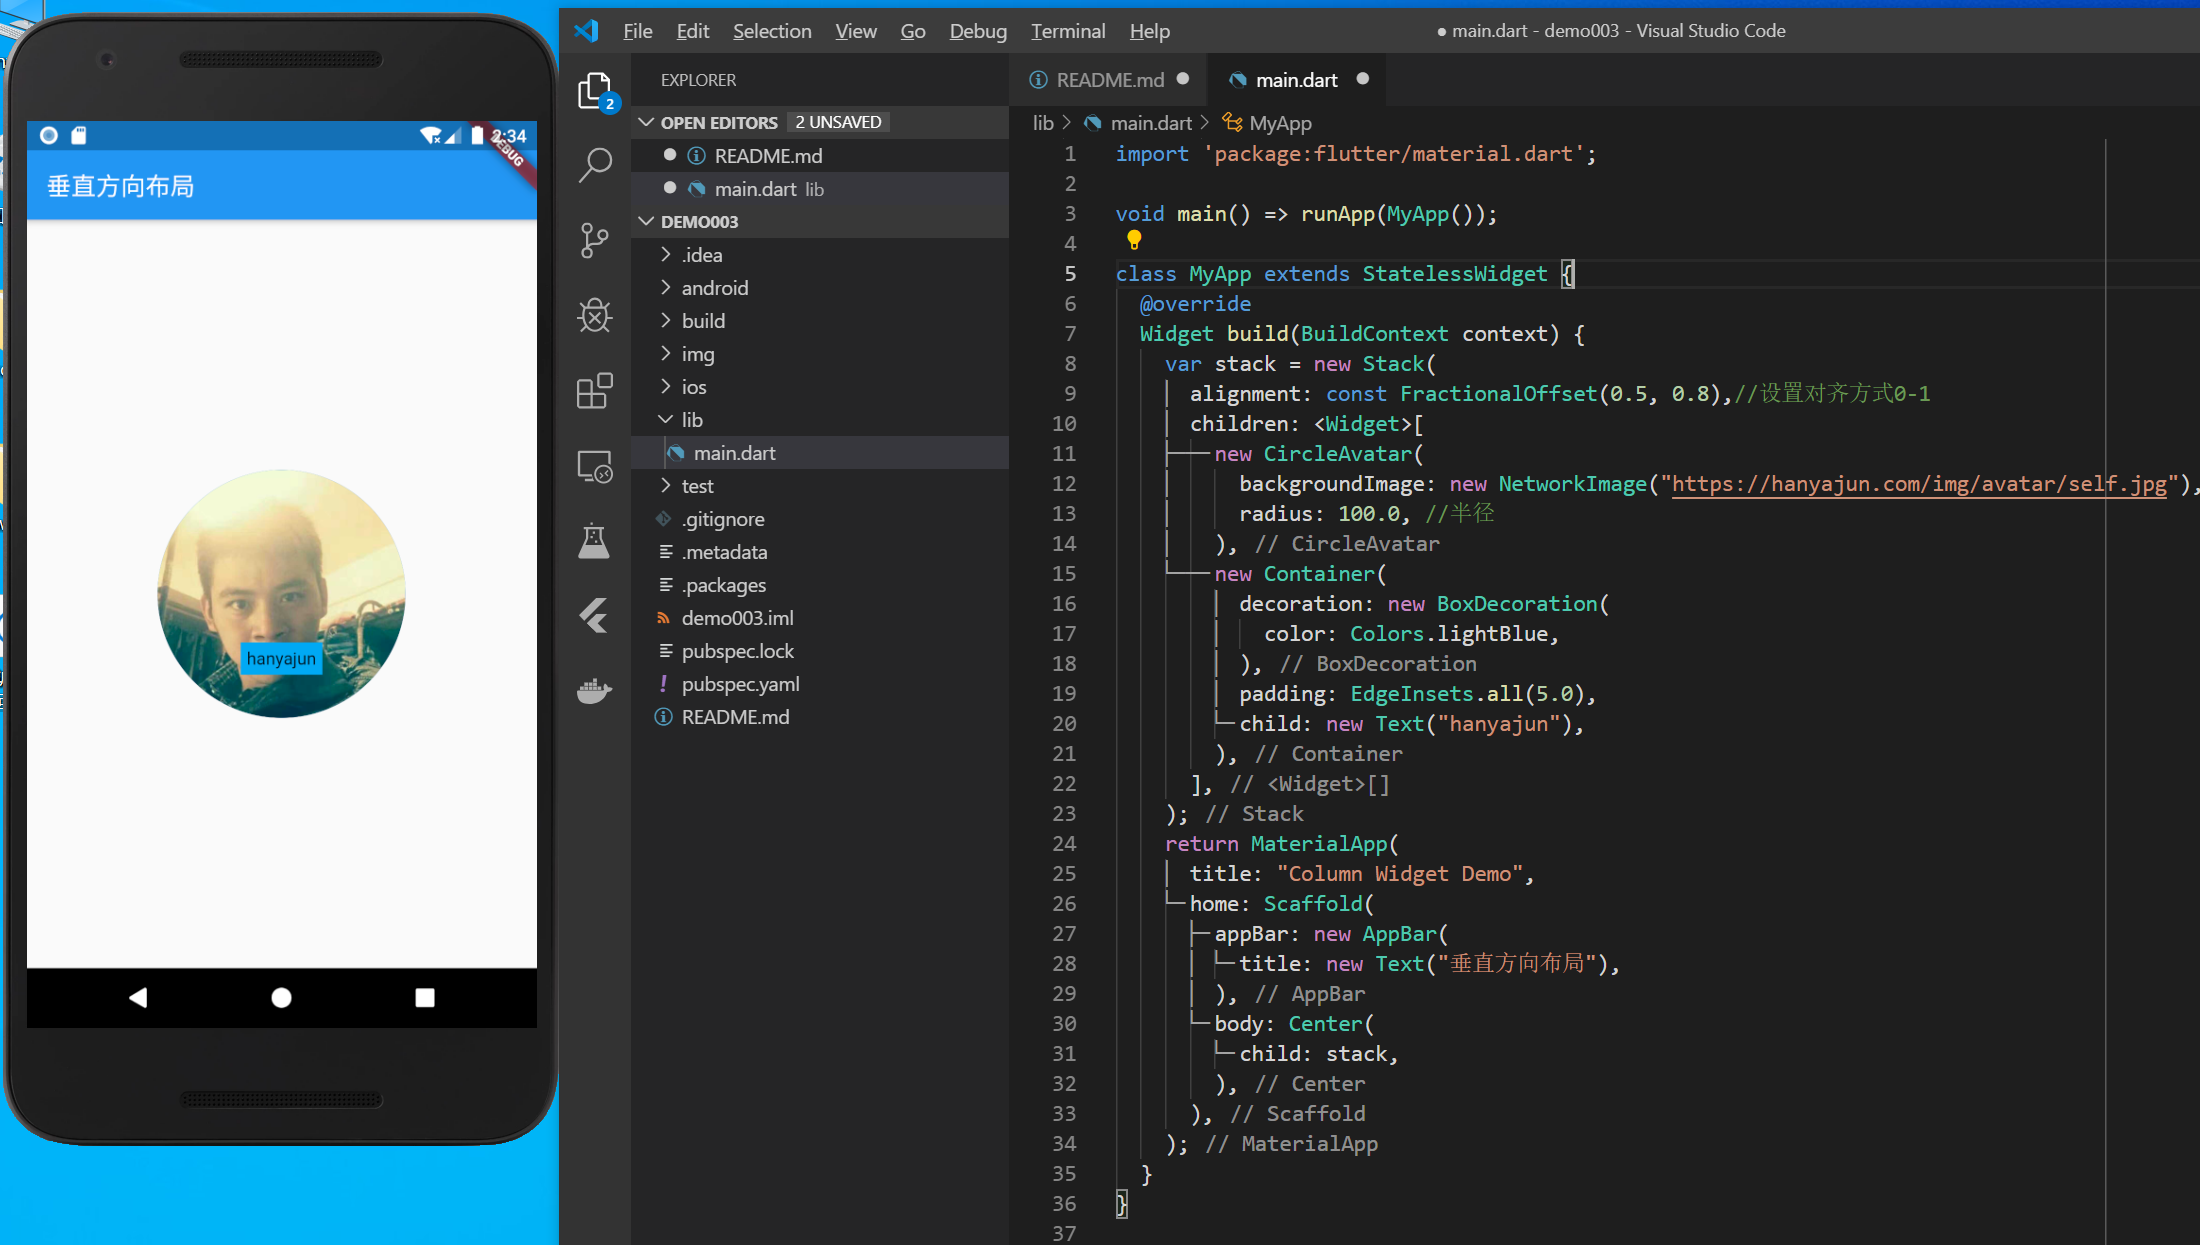
Stack Widget 层叠布局
在头像上方再放入一个容器,容器里边写上字,这时候我们就可以使用Stack布局。
1 | import 'package:flutter/material.dart'; |
- 层叠布局的 alignment 属性
alignment属性是控制层叠的位置的,建议在两个内容进行层叠时使用。它有两个值X轴距离和Y轴距离,值是从0到1的,都是从上层容器的左上角开始算起的。
- CircleAvatar组件的使用
CircleAvatar这个经常用来作头像的,组件里边有个radius的值可以设置图片的弧度。
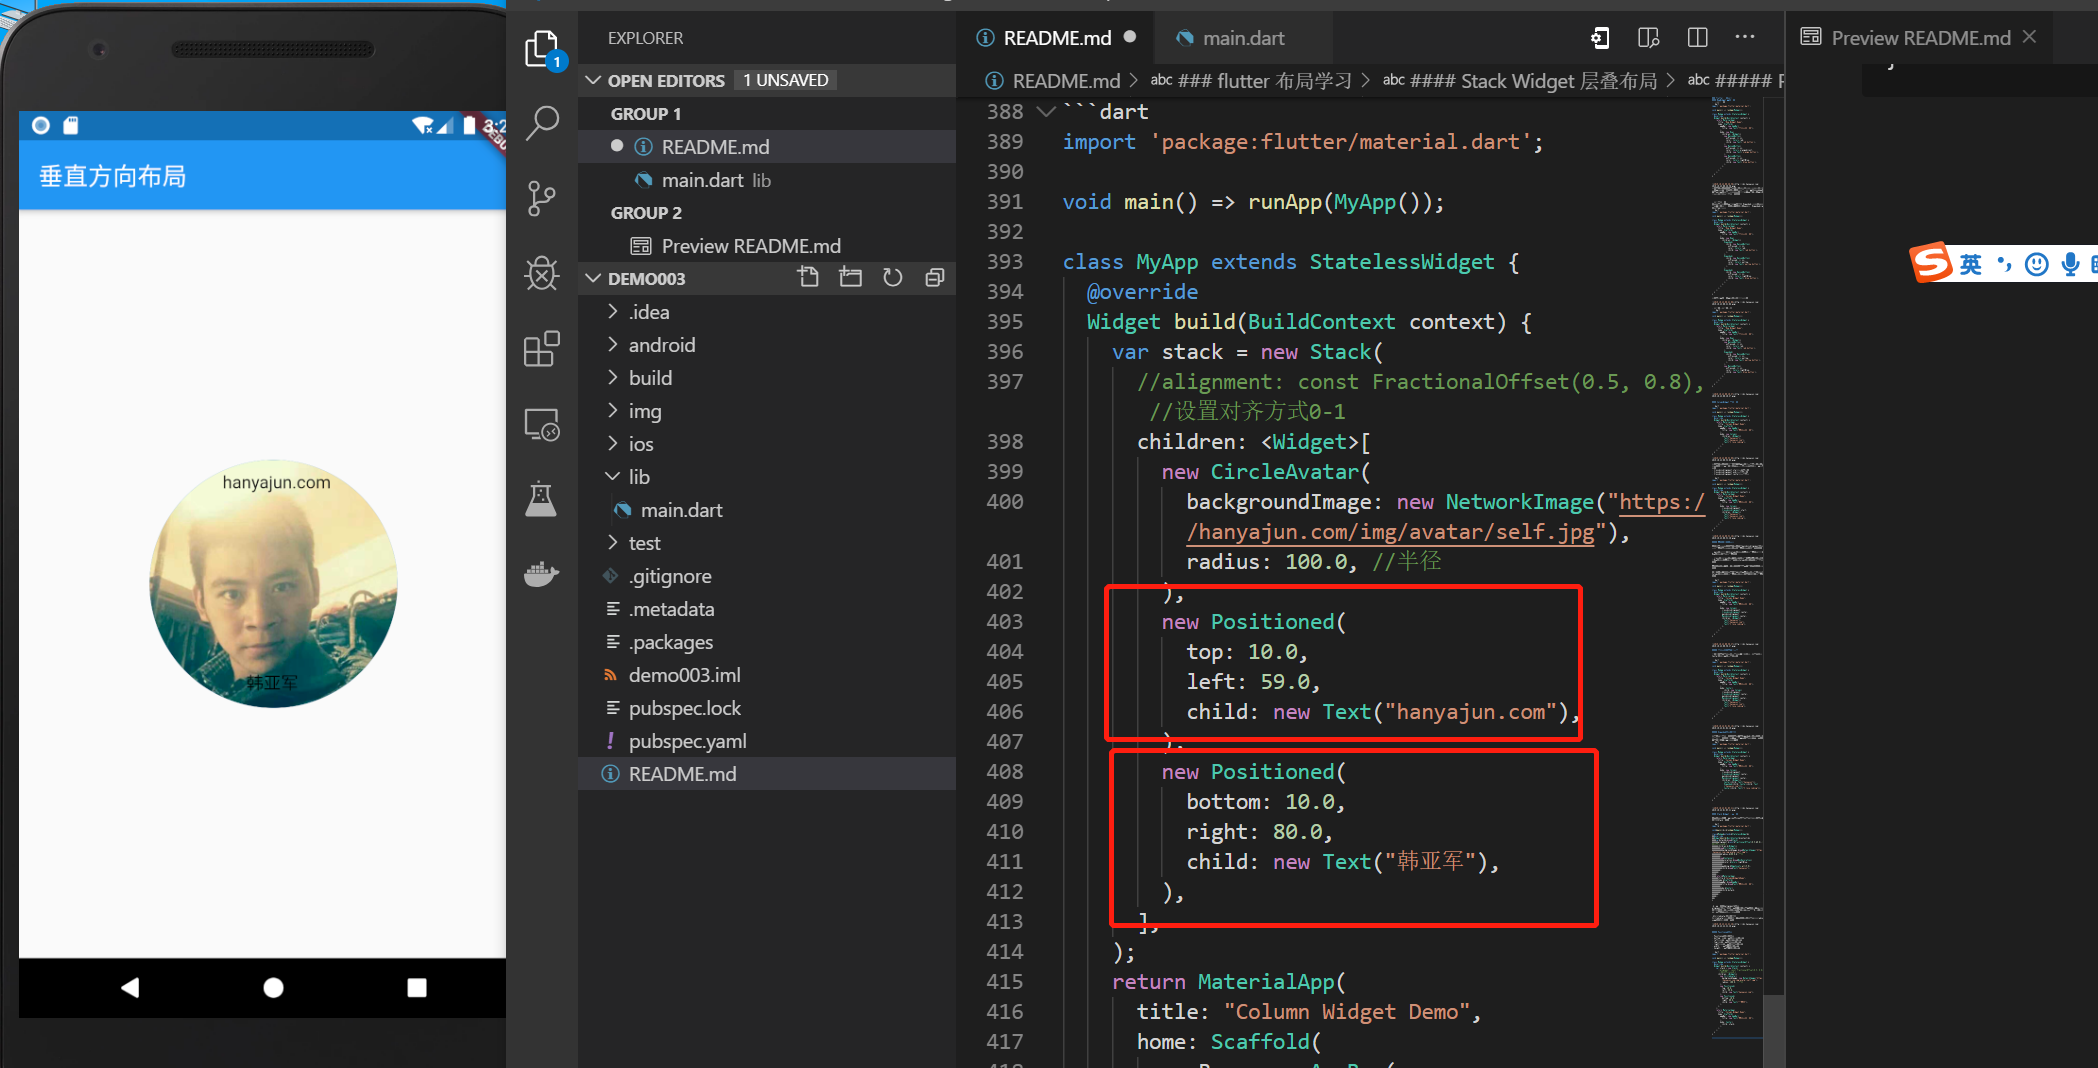
Positioned属性
- Positioned组件的属性
- bottom: 距离层叠组件下边的距离
- left:距离层叠组件左边的距离
- top:距离层叠组件上边的距离
- right:距离层叠组件右边的距离
- width: 层叠定位组件的宽度
- height: 层叠定位组件的高度
1 | import 'package:flutter/material.dart'; |
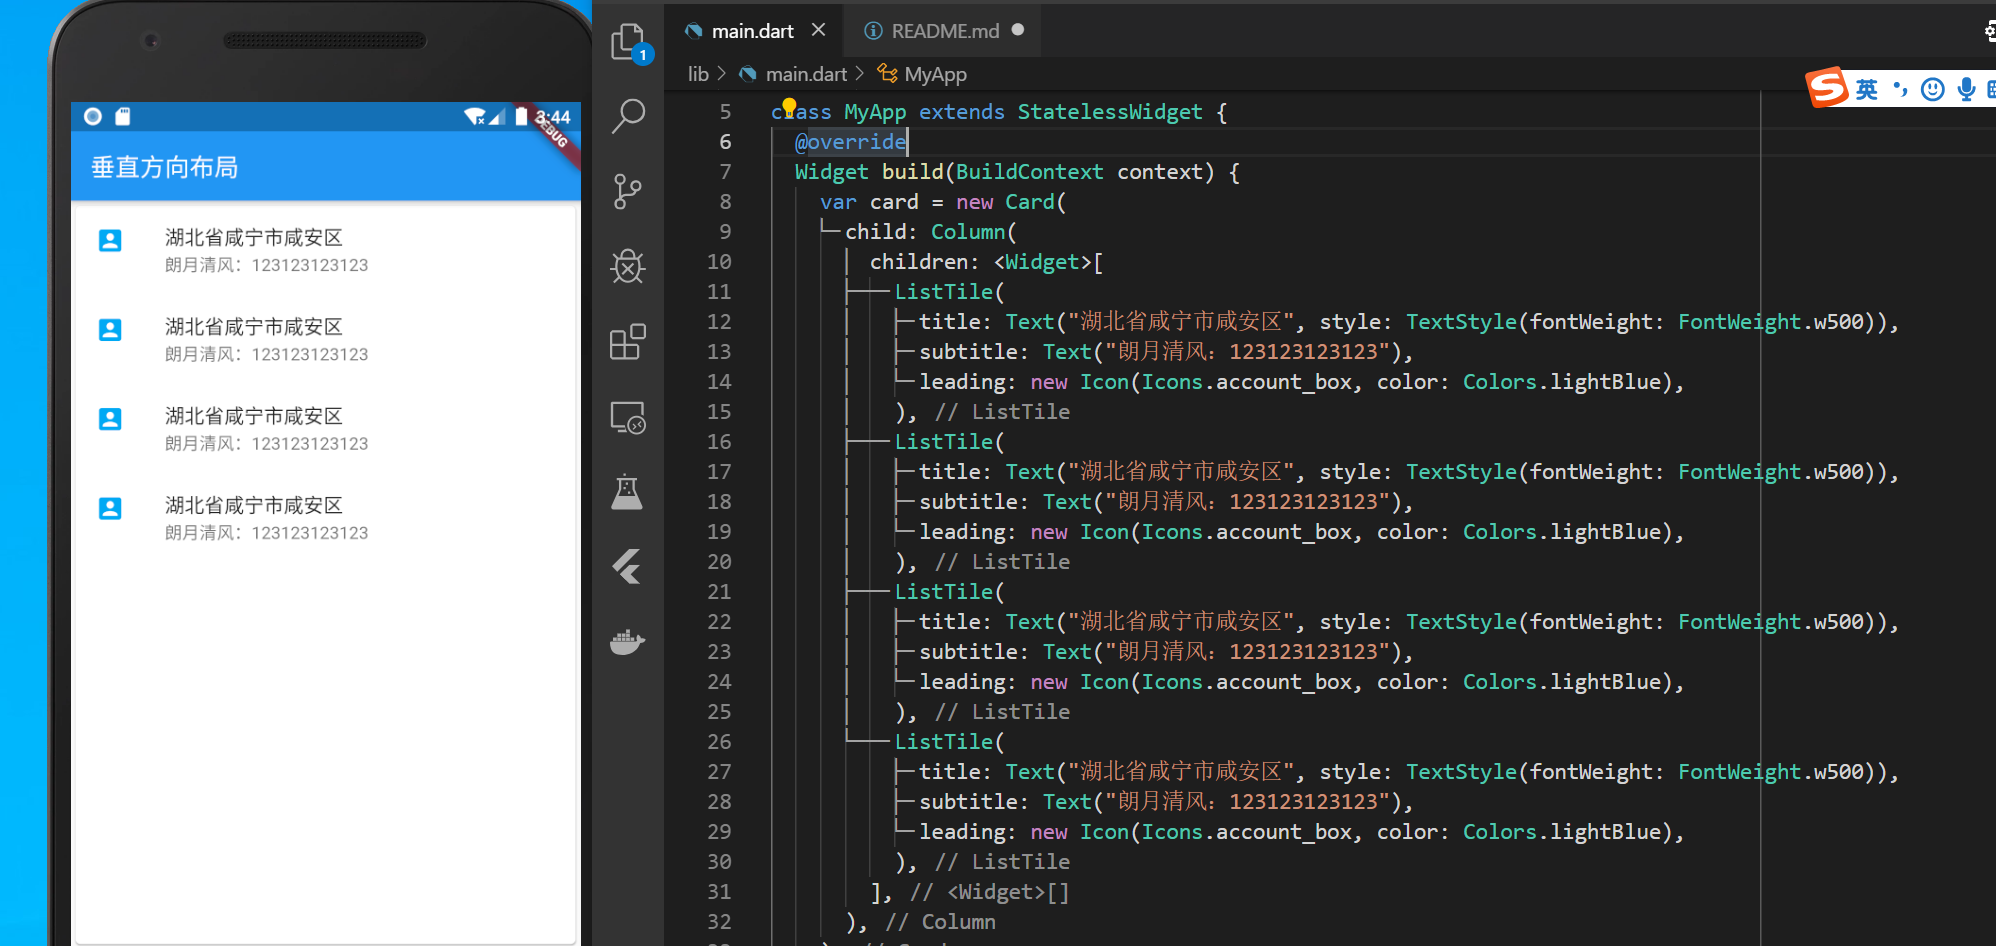
card widget
1 | import 'package:flutter/material.dart'; |
代码中使用了一个垂直布局组件Column组件,然后利用了ListTile实现内部列表,这里需要说明的是ListTile不光可以使用在ListView组件中
推荐文章
 支付宝打赏
支付宝打赏
 微信打赏
微信打赏
坚持原创技术分享,您的支持将鼓励我继续创作!