flutter study
基础组件
Text Widget
1
2
3
4
5
6
7
8
9
10
11
12
13
14
15
16
17
18
19
20
21
22
23
24
25
26
27
28
import 'package:flutter/material.dart' ;void main() => runApp(MyApp());class MyApp extends StatelessWidget @override Widget build(BuildContext context) { return MaterialApp( title: 'text widget' , home: Scaffold( body: Center( child: Text( 'hello,widget,asdfaaaaaaaaaaaaaaaaaaaaaaaa' , textAlign: TextAlign.center, maxLines:1 , overflow: TextOverflow.ellipsis, style: TextStyle( fontSize:25.0 , color:Color.fromARGB(255 , 255 , 125 , 125 ), decoration:TextDecoration.underline, decorationStyle:TextDecorationStyle.solid ), ), ), )); } }
TextAlign属性
TextAlign属性就是文本的对齐方式,它的属性值有如下几个(详细请看视频中讲解):
center: 文本以居中形式对齐,这个也算比较常用的了。
left:左对齐,经常使用,让文本居左进行对齐,效果和start一样。
right :右对齐,使用频率也不算高。
start:以开始位置进行对齐,类似于左对齐。
end: 以为本结尾处进行对齐,不常用。有点类似右对齐.
总结起来,也就算三个对齐方式,left(左对齐)、center(居中对齐)、right(右对齐)
maxLines属性
设置最多显示的行数
overflow属性
overflow属性是用来设置文本溢出时,如何处理,它有下面几个常用的值供我们选择。
clip:直接切断,剩下的文字就没有了,感觉不太友好,体验性不好。
ellipsis:在后边显示省略号,体验性较好,这个在工作中经常使用。
fade: 溢出的部分会进行一个渐变消失的效果,当然是上线的渐变,不是左右的哦。
style属性
style属性的内容比较多,具体的你可以查一下API
1
2
3
4
5
6
7
8
9
10
11
12
13
14
15
16
17
18
19
20
21
22
23
24
25
26
27
28
29
30
import 'package:flutter/material.dart' ;void main() => runApp(MyApp());class MyApp extends StatelessWidget @override Widget build(BuildContext context) { return MaterialApp( title: 'text widget' , home: Scaffold( body: Center( child: Container( child: new Text("hello hanyajun " , style: TextStyle(fontSize: 40.0 )), alignment: Alignment.topLeft, width: 500.0 , height: 400.0 , padding: const EdgeInsets.all(10.0 ), margin: const EdgeInsets.all(10.0 ), decoration: new BoxDecoration( gradient: const LinearGradient(colors: [Colors.lightBlue, Colors.green] ), border: Border.all(width: 5.0 , color: Colors.red) ) )), )); } }
Alignment属性
这个属性针对的是Container内child的对齐方式,也就是容器子内容的对齐方式,并不是容器本身的对齐方式。
bottomCenter:下部居中对齐。
botomLeft: 下部左对齐。
bottomRight:下部右对齐。
center:纵横双向居中对齐。
centerLeft:纵向居中横向居左对齐。
centerRight:纵向居中横向居右对齐。
topLeft:顶部左侧对齐。
topCenter:顶部居中对齐。
topRight: 顶部居左对齐。
设置宽、高和颜色属性
设置宽、高和颜色属性是相对容易的,只要在属性名称后面加入浮点型数字就可以了
padding属性
padding的属性就是一个内边距,它和你使用的前端技术CSS里的padding表现形式一样,指的是Container边缘和child内容的距离
1 padding:const EdgeInsets.all(10.0 ),
这句的意思是设置Container的内边距是10,左右上下全部为10
我们用EdgeInsets.fromLTRB(value1,value2,value3,value4) 可以满足我们的需求,LTRB分别代表左、上、右、下
margin属性
margin是外边距,指的是container和外部元素的距离。
decoration属性
decoration是 container 的修饰器,主要的功能是设置背景和边框。
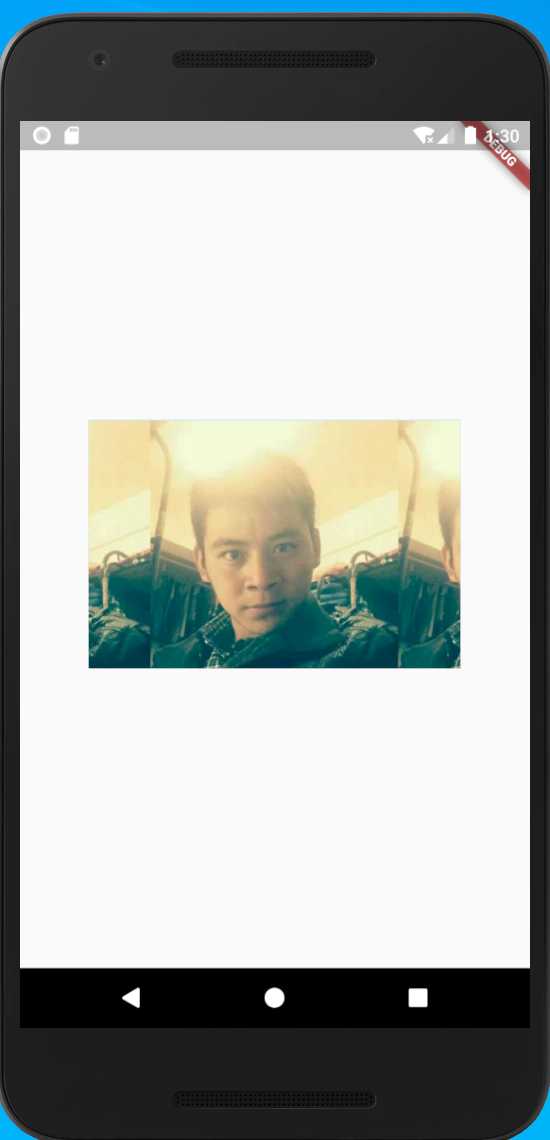
1
2
3
4
5
6
7
8
9
10
11
12
13
14
15
16
17
18
19
20
21
22
23
24
25
26
27
28
29
30
import 'package:flutter/material.dart' ;void main() => runApp(MyApp());class MyApp extends StatelessWidget @override Widget build(BuildContext context) { return MaterialApp( title: 'text widget' , home: Scaffold( body: Center( child: Container( child: new Image.network( 'https://hanyajun.com/img/avatar/self.jpg' , repeat: ImageRepeat.repeatX ), width: 300.0 , height: 200.0 , color:Colors.lightBlue, ) ) ) ); } }
加入图片的几种方式
Image.asset:加载资源图片,就是加载项目资源目录中的图片,加入图片后会增大打包的包体体积,用的是相对路径。
Image.network:网络资源图片,意思就是你需要加入一段http://xxxx.xxx的这样的网络路径地址。
Image.file:加载本地图片,就是加载本地文件中的图片,这个是一个绝对路径,跟包体无关。
Image.memory: 加载Uint8List资源图片
fit属性的设置
fit属性可以控制图片的拉伸和挤压,这些都是根据图片的父级容器来的.
BoxFit.fill:全图显示,图片会被拉伸,并充满父容器。
BoxFit.contain:全图显示,显示原比例,可能会有空隙。
BoxFit.cover:显示可能拉伸,可能裁切,充满(图片要充满整个容器,还不变形)。
BoxFit.fitWidth:宽度充满(横向充满),显示可能拉伸,可能裁切。
BoxFit.fitHeight :高度充满(竖向充满),显示可能拉伸,可能裁切。
BoxFit.scaleDown:效果和contain差不多,但是此属性不允许显示超过源图片大小,可小不可大。
图片的混合模式
图片混合模式(colorBlendMode)和color属性配合使用,能让图片改变颜色,里边的模式非常的多,产生的效果也是非常丰富的
1 2 3 4 5 child:new Image.network( 'http://jspang.com/static/myimg/blogtouxiang.jpg' , color: Colors.greenAccent, colorBlendMode: BlendMode.darken, ),
color:是要混合的颜色,如果你只设置color是没有意义的。
colorBlendMode:是混合模式,相当于我们如何混合。
repeat图片重复
ImageRepeat.repeat : 横向和纵向都进行重复,直到铺满整个画布。
ImageRepeat.repeatX: 横向重复,纵向不重复。
ImageRepeat.repeatY:纵向重复,横向不重复。
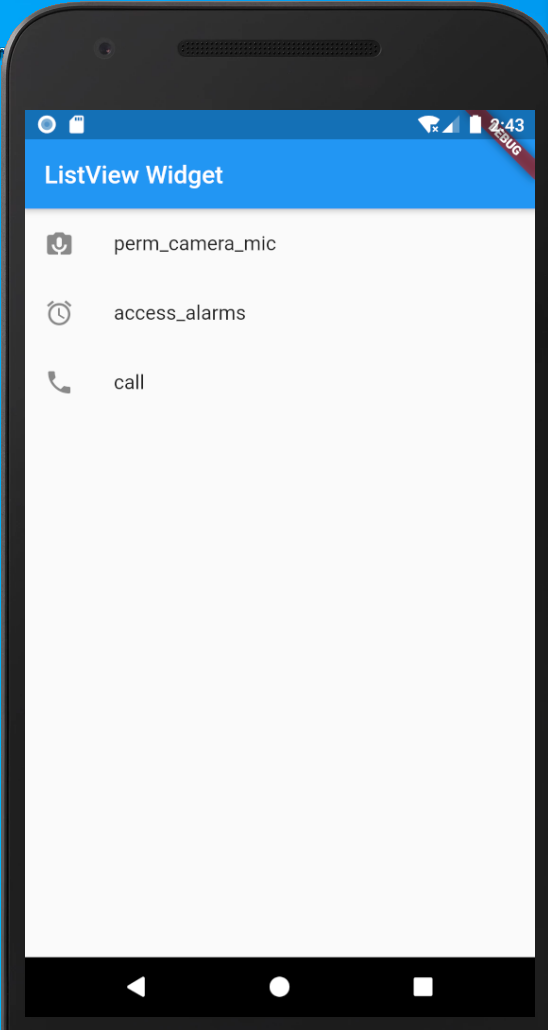
1
2
3
4
5
6
7
8
9
10
11
12
13
14
15
16
17
18
19
20
21
22
23
24
25
26
27
28
29
30
31
32
33
import 'package:flutter/material.dart' ;void main() => runApp(MyApp());class MyApp extends StatelessWidget @override Widget build(BuildContext context) { return MaterialApp( title: "hanyajun" , home: Scaffold( appBar: new AppBar( title: new Text("ListView Widget" ), ), body: new ListView( children: <Widget>[ new ListTile( leading: new Icon(Icons.perm_camera_mic), title: new Text("perm_camera_mic" ), ), new ListTile( leading: new Icon(Icons.access_alarms), title: new Text("access_alarms" ), ), new ListTile( leading: new Icon(Icons.call), title: new Text("call" ), ), ], ), ), ); } }
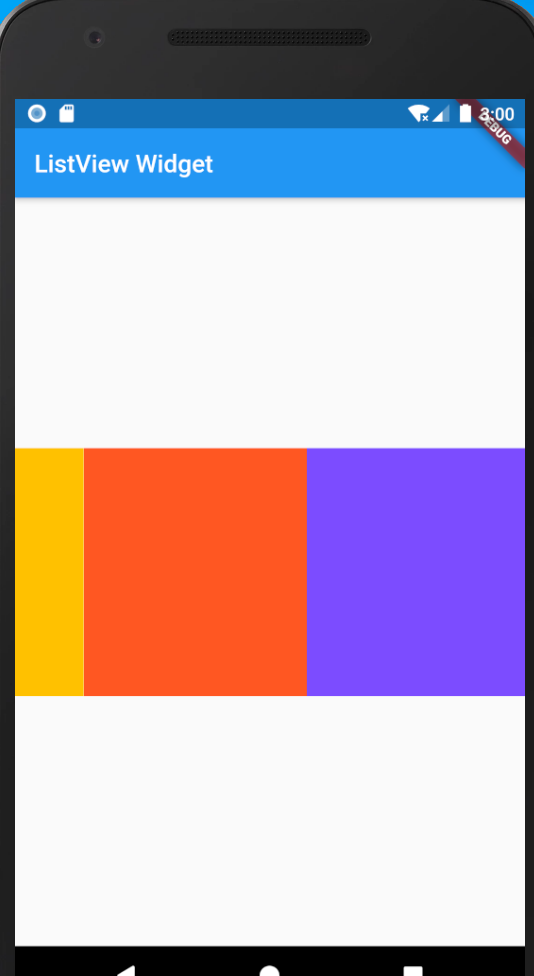
crollDirection属性
ListView组件的scrollDirection属性只有两个值,一个是横向滚动,一个是纵向滚动。默认的就是垂直滚动,所以如果是垂直滚动,我们一般都不进行设置。
Axis.horizontal:横向滚动或者叫水平方向滚动。
Axis.vertical:纵向滚动或者叫垂直方向滚动。
1
2
3
4
5
6
7
8
9
10
11
12
13
14
15
16
17
18
19
20
21
22
23
import 'package:flutter/material.dart' ;void main() => runApp(MyApp());class MyApp extends StatelessWidget @override Widget build(BuildContext context) { return MaterialApp( title: "hanyajun" , home: Scaffold( appBar: new AppBar( title: new Text("ListView Widget" ), ), body: new ListView( children: <Widget>[ new Image.network("https://hanyajun.com/img/avatar/self.jpg" ), new Image.network("https://hanyajun.com/img/avatar/self.jpg" ), ], ), ), ); } }
1
2
3
4
5
6
7
8
9
10
11
12
13
14
15
16
17
18
19
20
21
22
23
24
25
26
27
28
29
30
31
32
33
34
35
36
37
38
39
40
41
import 'package:flutter/material.dart' ;void main() => runApp(MyApp());class MyApp extends StatelessWidget @override Widget build(BuildContext context) { return MaterialApp( title: "hanyajun" , home: Scaffold( appBar: new AppBar( title: new Text("ListView Widget" ), ), body: new Center( child: Container( height: 200 , child: new ListView(scrollDirection: Axis.horizontal, children: <Widget>[ new Container( width: 180 , color: Colors.lightBlue, ), new Container( width: 180 , color: Colors.amber, ), new Container( width: 180 , color: Colors.deepOrange, ), new Container( width: 180 , color: Colors.deepPurpleAccent, ), ]), ), ), ), ); } }
1
2
3
4
5
6
7
8
9
10
11
12
13
14
15
16
17
18
19
20
21
22
23
24
25
26
27
28
29
30
31
32
33
34
35
36
37
38
39
40
41
42
43
44
45
46
47
48
49
50
import 'package:flutter/material.dart' ;void main() => runApp(MyApp());class MyApp extends StatelessWidget @override Widget build(BuildContext context) { return MaterialApp( title: "hanyajun" , home: Scaffold( appBar: new AppBar( title: new Text("ListView Widget" ), ), body: new Center( child: Container( height: 200 , child: MyList(), ), ), ), ); } } class MyList extends StatelessWidget @override Widget build(BuildContext context) { return ListView( scrollDirection: Axis.horizontal, children: <Widget>[ new Container( width: 180 , color: Colors.lightBlue, ), new Container( width: 180 , color: Colors.amber, ), new Container( width: 180 , color: Colors.deepOrange, ), new Container( width: 180 , color: Colors.deepPurpleAccent, ), ] ); } }
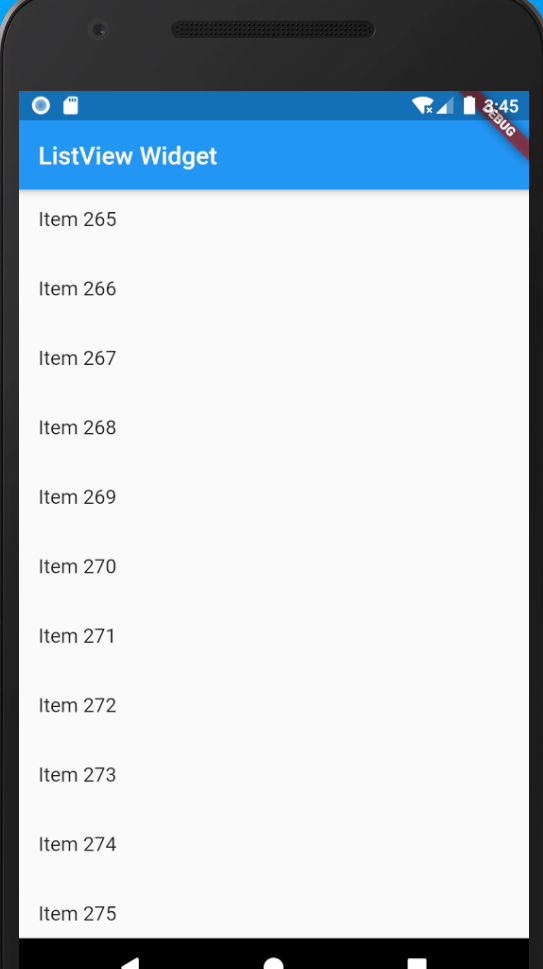
1
2
3
4
5
6
7
8
9
10
11
12
13
14
15
16
17
18
19
20
21
22
23
24
25
26
27
28
29
import 'package:flutter/material.dart' ;void main() => runApp(MyApp(items: new List <String >.generate(1000 , (i) => "Item $i" )));class MyApp extends StatelessWidget final List <String > items; MyApp({Key key, @required this .items}) : super (key: key); @override Widget build(BuildContext context) { return MaterialApp( title: "hanyajun" , home: Scaffold( appBar: new AppBar( title: new Text("ListView Widget" ), ), body: new ListView.builder( itemCount: items.length, itemBuilder: (context, index) { return new ListTile( title: new Text("${items[index]} " ), ); }, ), ), ); } }
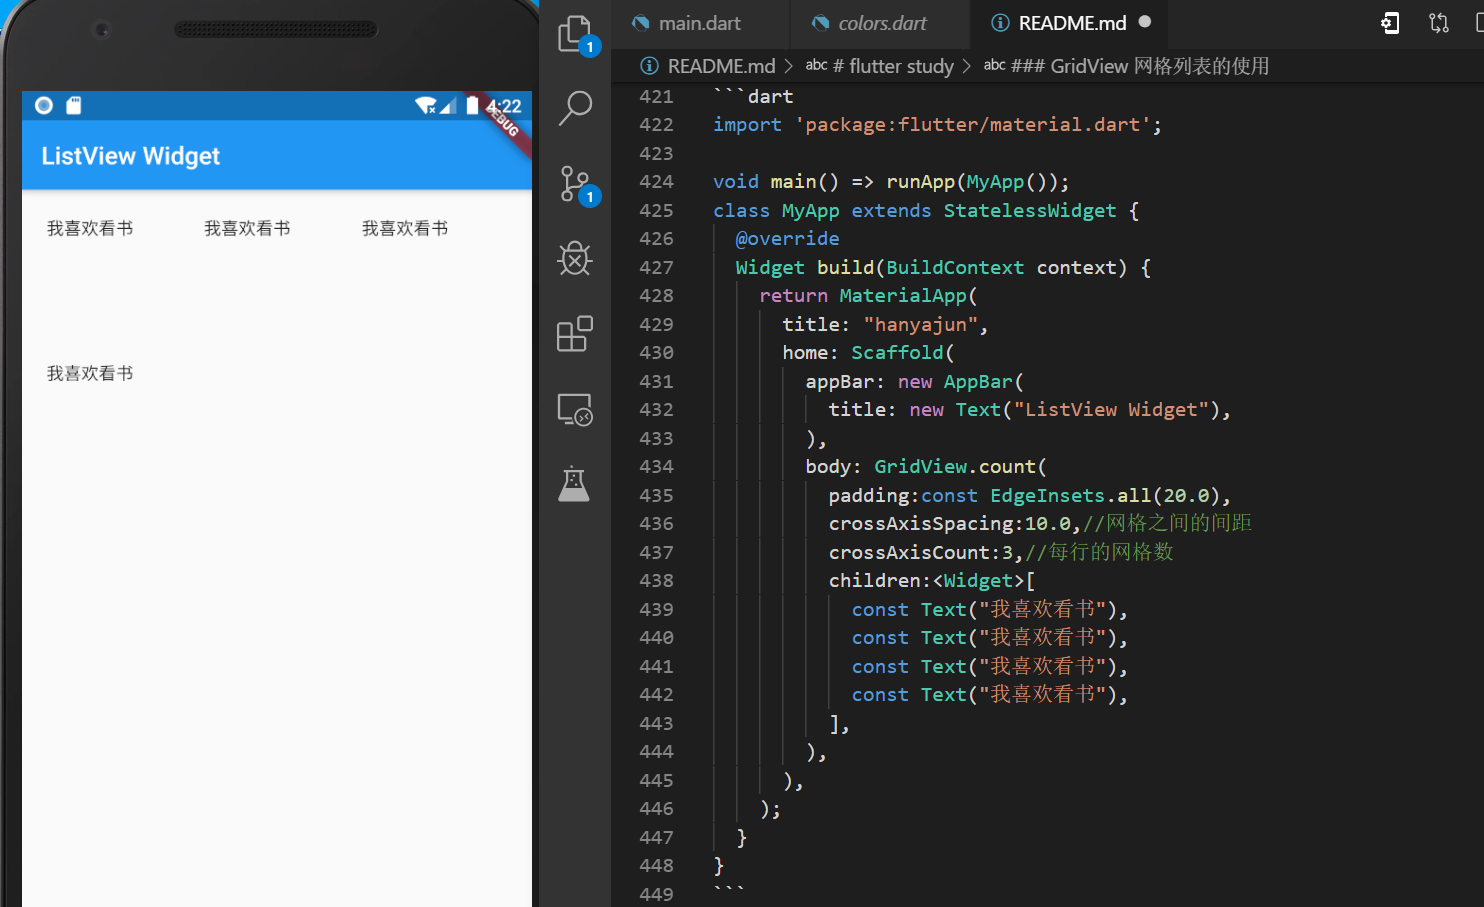
GridView 网格列表的使用
1
2
3
4
5
6
7
8
9
10
11
12
13
14
15
16
17
18
19
20
21
22
23
24
25
26
27
import 'package:flutter/material.dart' ;void main() => runApp(MyApp());class MyApp extends StatelessWidget @override Widget build(BuildContext context) { return MaterialApp( title: "hanyajun" , home: Scaffold( appBar: new AppBar( title: new Text("ListView Widget" ), ), body: GridView.count( padding:const EdgeInsets.all(20.0 ), crossAxisSpacing:10.0 , crossAxisCount:3 , children:<Widget>[ const Text("我喜欢看书" ), const Text("我喜欢看书" ), const Text("我喜欢看书" ), const Text("我喜欢看书" ), ], ), ), ); } }
padding:表示内边距,这个小伙伴们应该很熟悉。
crossAxisSpacing:网格间的空当,相当于每个网格之间的间距。
crossAxisCount:网格的列数,相当于一行放置的网格数量。
1
2
3
4
5
6
7
8
9
10
11
12
13
14
15
16
17
18
19
20
21
22
23
24
25
26
27
28
29
30
31
32
33
34
35
36
import 'package:flutter/material.dart' ;void main() => runApp(MyApp());class MyApp extends StatelessWidget @override Widget build(BuildContext context) { return MaterialApp( title: "hanyajun" , home: Scaffold( appBar: new AppBar( title: new Text("ListView Widget" ), ), body: GridView( gridDelegate: SliverGridDelegateWithFixedCrossAxisCount( crossAxisCount:3 , mainAxisSpacing: 2.0 , crossAxisSpacing: 2.0 , childAspectRatio: 0.75 ), children:<Widget>[ new Image.network('http://img5.mtime.cn/mt/2018/10/22/104316.77318635_180X260X4.jpg' ,fit: BoxFit.cover), new Image.network('http://img5.mtime.cn/mt/2018/10/10/112514.30587089_180X260X4.jpg' ,fit: BoxFit.cover), new Image.network('http://img5.mtime.cn/mt/2018/11/13/093605.61422332_180X260X4.jpg' ,fit: BoxFit.cover), new Image.network('http://img5.mtime.cn/mt/2018/11/07/092515.55805319_180X260X4.jpg' ,fit: BoxFit.cover), new Image.network('http://img5.mtime.cn/mt/2018/11/21/090246.16772408_135X190X4.jpg' ,fit: BoxFit.cover), new Image.network('http://img5.mtime.cn/mt/2018/11/17/162028.94879602_135X190X4.jpg' ,fit: BoxFit.cover), new Image.network('http://img5.mtime.cn/mt/2018/11/19/165350.52237320_135X190X4.jpg' ,fit: BoxFit.cover), new Image.network('http://img5.mtime.cn/mt/2018/11/16/115256.24365160_180X260X4.jpg' ,fit: BoxFit.cover), new Image.network('http://img5.mtime.cn/mt/2018/11/20/141608.71613590_135X190X4.jpg' ,fit: BoxFit.cover), ] ), ), ); } }
childAspectRatio:宽高比,这个值的意思是宽是高的多少倍,如果宽是高的2倍,那我们就写2.0,如果高是宽的2倍,我们就写0.5


 支付宝打赏
支付宝打赏
 微信打赏
微信打赏